Saturday, August 6, 2011

Crafting a Square Pyrite Ring

While visiting my family up in Pennsylvania I picked up a couple square pieces of pyrite. Pyrite is fools gold and looks really neat when incorporated into a jewelry piece. I knew what I wanted to do with it but wasn't sure how to go about it.

Today i decided to wing it. I really wasn't positive if my idea would work but I decided to give it a try.  My goal was to make a ring with a square base and a 3 sided box for the pyrite to sit in.

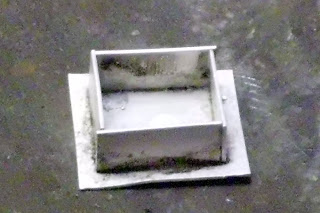
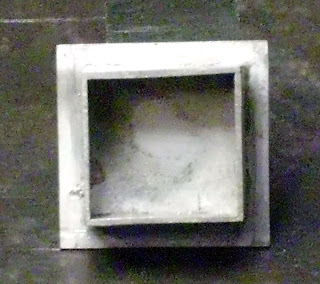
1. The first step was to measure out a square piece of silver large enough to fit the pyrite on with some room to spare on each side. Then I cut out strips of silver of the same length and height to make the box out of.


2. After trying out different arrangements I had to figure out how to construct the box. This was difficult because of the way the pieces needed to fit together. It would have been very difficult to try to solder these pieces either directly to the square piece or to each other without something going wrong. In the end I decided to weld each individual piece to the square, and from there solder them.

Welding the Silver Strip to the Silver Square Base

3. The strips then need to be soldered in order to become permanent.

About to Heat the Piece to Melt the Solder
Heating the Piece Up
All Four Sides Soldered On

4. Now the box and square need to be cleaned up by filing off the extra metal and also filing away the solder seams between the strips of the box.

Filing Extra Metal Off

Everything is Filed Smooth 
5. Now it's time to work on the band. I want this ring to fit on my pointer finger. To do this I make a strip of paper the width that I want the band to be. Then wrap it around my finger and where the the strip overlaps is the length that the ring needs to be. This piece of paper then gets glued to a piece of silver and cut out. 

Ring Shank is Ready to Be Cut Out
6. After the strip is cut out it gets shaped around a ring mandrel. This is done in part by hand and in part by leather mallet.

Shaping the Band


Shaping the Band

7. After making sure the ends meet without any gaps the band can be soldered.

The Soldered Band
8. The solder seam was filed off and the ring band was given a decorative design using chasing tools and a hammer.The box was also given a frosted texture using a small bur in the flex shaft. The band and box were then soldered together.

Ring After Being Soldered Together

9. The ring is then painted with silver black.
Silver Black Applied
The Ring is Then Put Into the Tumbler For 2 Hours
The Ring all Shined Up
10. The pyrite is ready to be placed into the box. Both the pyrite and the inside of the box have epoxy resin applied. Then the pyrite is set in and left over night. 

Finished!
Finished!!

Thursday, August 4, 2011

Upcycled Sterling Fork

I was up in Pennsylvania about a month ago and made a point of visiting some of the different antique shops up there. One of the items I bought was a sterling silver three pronged fork. I knew as soon as I saw it that something cool could be made. 

Today I started to play around with the fork and decided on making it into a ring. I've done spoons and I like the whole silverware theme. 

1. First I sawed the head of the fork off of the stem.

2. Second, I shaped the stem into a ring by hammering it around a ring mandrel.

3. The ends of the stem were then soldered together to make it a continuous circle.
Fork Stem Hammered into Ring Shape


4. After the ends were soldered, smoothed the edges out with a diamond file and 400 grit sandpaper.

5. The next step was to solder the the head of the fork onto the newly made band. This step proved difficult because of the difficulty of getting the band to stay on the part of the fork head that I wanted it to sit. In the end I was able to do it. 

 
Fork Head Soldered to Band

Fork Head Soldered to Band
6. I then soldered an oval, fine silver bezel cup to the middle of the fork head in order to set a stone onto the ring.

About to Set the Bezel Cup onto the Fork

Bezel Cup Has Been Fluxed, Solder Placed Under Cup, Ready to Heat

Bezel Cup After Soldering
7. The ring is then put into the pickle for about five minutes, then brought out and rinsed. The stone is ready to be set. 

8. The stone is gently set into the bezel. Using a bezel pusher, the lips of the cup are pushed over onto the stone, keeping it in place. It is important to overlap each push to prevent marking the metal.

Pushing the Bezel
Pushing the Bezel
 9. After the the bezel has been pushed in several times it's ready to be messed with. I wasn't sure what I wanted to do with the prongs. I decided to try curling them up to see how it looked. I ended up not liking it so i put them back. In the process the prongs got dented up quite a bit so to make it look better I went over the whole of the fork head surface with the flex shaft to give it a nice texture.

Ring After Being Textured With the Flex Shaft

10. Now it's time to give the ring a patina. I am fond of the product, Silver Black. Like the name says, it turns silver black. That may not sound too nice but once it gets shined up with some steel wool and then thrown into the tumbler it looks very nice.
After Applying the Silver Black

11.After going over it a bit with some steel wool it's ready to go into the tumbler. The tumbler is a machine that shines the metal up beautifully. The ring gets left in the tumbler for about two hours and then it's ready to wear!

The Finished Product!


This ring is a new twist on a classic idea and I'm very happy with the way it turned out!!

I'm So Super Excited!


Tuesday, February 22, 2011

Fucking With Facebook- Africa

Alright.. So my newest joke involves me posting pictures saying that I have gone to Africa. I do not know why this is funny but it certainly is. I started off with a realistic looking picture of a plane window announcing that I had just arrived in Africa.


As you can see mostly everyone believed I had really gone to Africa...a few of my friends helped the joke along.

The next day I posted a not so realistic picture of one of my African adventures...
The point of this whole thing wasn't to actually make people think i was in Africa, although that was fun. I thought it would be awesome to try to make it as obvious as possible that I actually wasn't in Africa and that what I do for fun is make up places i've been and photoshop pictures. Slightly sad I know!

Next I pulled out the big guns with my face photoshopped onto a picture of Angelina Jolie with African children. I maayy have offended some people with this...


More amazing pictures of my African adventures coming soon!! 

Saturday, February 12, 2011

Pewter Casting

Today was my first time working with pewter. Definitely a good time.
I experimented with different techniques but succeeded in making a pewter bowl by pouring the molten metal into a stainless steel wok and swirling it around to create the shape of a bowl. The trick is making sure that it's thick enough in places. You can make different textures by how you move it or don't move it.
Pouring the pewter into the wok.

 Swirling the metal around to achieve the desired shape.
  The molten pewter
    Some of the bowls we made
  Our Bowls
My finished bowl

Next our teacher showed us how he makes pewter statues molded off the cast of a human figure.

Pouring the pewter into the plaster mold.
Making different layers

   Almost finished
The finished cast
I can't wait to start making my own molds! More things that i now have to spend money on!!