While visiting my family up in Pennsylvania I picked up a couple square pieces of pyrite. Pyrite is fools gold and looks really neat when incorporated into a jewelry piece. I knew what I wanted to do with it but wasn't sure how to go about it.
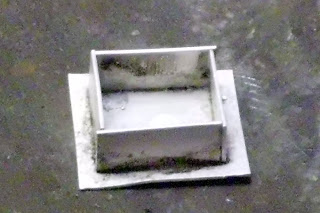
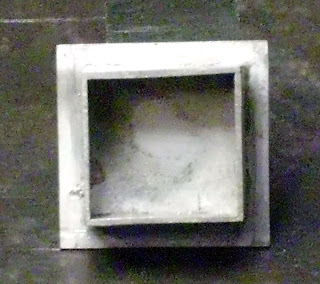
Today i decided to wing it. I really wasn't positive if my idea would work but I decided to give it a try. My goal was to make a ring with a square base and a 3 sided box for the pyrite to sit in.
1. The first step was to measure out a square piece of silver large enough to fit the pyrite on with some room to spare on each side. Then I cut out strips of silver of the same length and height to make the box out of.
2. After trying out different arrangements I had to figure out how to construct the box. This was difficult because of the way the pieces needed to fit together. It would have been very difficult to try to solder these pieces either directly to the square piece or to each other without something going wrong. In the end I decided to weld each individual piece to the square, and from there solder them.
 |
| Welding the Silver Strip to the Silver Square Base |
3. The strips then need to be soldered in order to become permanent.
 |
| About to Heat the Piece to Melt the Solder |
|
 |
| Heating the Piece Up |
|
 |
| All Four Sides Soldered On |
4. Now the box and square need to be cleaned up by filing off the extra metal and also filing away the solder seams between the strips of the box.
 |
| Filing Extra Metal Off |
|
 |
| Everything is Filed Smooth | |
|
5. Now it's time to work on the band. I want this ring to fit on my pointer finger. To do this I make a strip of paper the width that I want the band to be. Then wrap it around my finger and where the the strip overlaps is the length that the ring needs to be. This piece of paper then gets glued to a piece of silver and cut out.
 |
| Ring Shank is Ready to Be Cut Out |
6. After the strip is cut out it gets shaped around a ring mandrel. This is done in part by hand and in part by leather mallet.
 |
| Shaping the Band |
 |
| Shaping the Band |
7. After making sure the ends meet without any gaps the band can be soldered.
 |
| The Soldered Band |
8. The solder seam was filed off and the ring band was given a decorative design using chasing tools and a hammer.The box was also given a frosted texture using a small bur in the flex shaft. The band and box were then soldered together.
 |
| Ring After Being Soldered Together |
 |
| Ring After Being Soldered Together |
9. The ring is then painted with silver black.
 |
| Silver Black Applied |
 |
| The Ring is Then Put Into the Tumbler For 2 Hours |
 |
| The Ring all Shined Up |
10. The pyrite is ready to be placed into the box. Both the pyrite and the inside of the box have epoxy resin applied. Then the pyrite is set in and left over night.
 |
| Finished! |
 |
| Finished!! |


No comments:
Post a Comment